How to Build a PC Without Losing Your Mind
Difficulty Level: Beginner to Intermediate
Time Required: 3-5 hours for first-time builders
Cost Range: \$800-\$2,500+ depending on specs
Introduction: Why Build Your Own PC?
Building your own PC is a rite of passage for many tech lovers, gamers, and creators. It's equal parts puzzle and performance upgrade, offering total control over your machine's power, aesthetics, and purpose. While it may seem daunting at first, the process is surprisingly straightforward when broken down into logical steps. All it takes is the right components, a bit of patience, and a willingness to dig in.
But why build instead of buy pre-built? Here's why thousands of enthusiasts choose the DIY route:
- Cost efficiency: Dollar for dollar, you'll get more performance
- Quality control: You choose every component's quality level
- Customization: From RGB lighting to silent operation, the choice is yours
- Upgrade potential: Easier future upgrades when you know your system inside and out
- Knowledge: Understanding your hardware makes troubleshooting simpler
- Pride: There's nothing quite like powering on a machine you built yourself
My Story: My first build in 2012 took me nearly 8 hours and involved one bent CPU pin (fixed with a mechanical pencil), two incorrect RAM installations, and a moment of panic when nothing powered on (forgot to flip the PSU switch). Today, I can assemble a system in under an hour. Trust me, if I can learn, anyone can.
Step 1: Plan Your Build
Define Your Use Case
Use Case | CPU Priority | GPU Priority | RAM Needs | Storage Needs |
|---|---|---|---|---|
Gaming | High single-core speed | Very high | 16GB+ | Fast boot drive + game library |
Content Creation | High multi-core performance | High | 32GB+ | Fast, large capacity |
Office/Productivity | Moderate | Low | 16GB | Moderate |
Streaming/Recording | Very high multi-core | High | 32GB+ | Fast, very large capacity |
Compact/HTPC | Low power | Moderate | 8-16GB | Moderate |
Before touching a single component, you need a blueprint. This planning phase is crucial and it will save you from compatibility nightmares, performance bottlenecks, and budget overruns.
Ask yourself these key questions:
- What's your primary use? Gaming? Video editing? Programming? General use?
- What's your budget ceiling? Be honest. Component costs add up quickly.
- What's your upgrade timeline? Building for the next 2 years or 5+?
- Any specific requirements? Size constraints? Noise limitations? Aesthetic preferences?
Research Current Component Generations
Technology moves fast. As of May 2025, we're working with:
- CPUs: AMD Ryzen 8000 series / Intel 14th Gen
- GPUs: NVIDIA RTX 5000 series / AMD Radeon RX 8000 series
- RAM: DDR5 is standard, with DDR4 still viable for budget builds
- Storage: PCIe 5.0 NVMe for high-end, PCIe 4.0 for mainstream
- Motherboards: AM5 for AMD, LGA 1700 for Intel
Use PC Part Picker (Your New Best Friend)
PC Part Picker is the definitive resource for planning your build. It offers: Compatibility checking between all components, Price tracking across major retailers, Community builds for inspiration, Wattage estimation for proper PSU selection, and Completed build guides with benchmarks. As a Pro Tip: Create an account to save multiple build configurations. This lets you easily compare different options at various price points.
Step 2: Gather the Core Components
Here's your shopping list, with each component's role and selection criteria explained in depth:
CPU (Central Processing Unit)
Think of the CPU as your PC's brain. It handles instructions, calculations, and coordinates activity across your system. Your CPU choice will influence almost every aspect of performance.
Key Specifications to Consider:
- Cores and Threads: More cores handle multi-tasking better
- Clock Speed: Higher GHz = faster single-thread performance
- Cache Size: Larger cache generally means better performance
- TDP (Thermal Design Power): Higher values mean more heat and power consumption
- Socket Type: Must match your motherboard (e.g., AM5, LGA1700)
- Integrated Graphics: Some CPUs include basic graphics capabilities
Current Top Choices (May 2025):
CPU Model | Cores/Threads | Best For | Price Range | Notes |
|---|---|---|---|---|
AMD Ryzen 7 8700X | 8/16 | All-around performance | \$330-380 | Great value for gaming/productivity |
Intel Core i5-14600K | 14 (6P+8E)/20 | Gaming-focused | \$280-320 | Strong single-core performance |
AMD Ryzen 9 8950X | 16/32 | Content creation | \$550-650 | Multitasking powerhouse |
Intel Core i9-14900K | 24 (8P+16E)/32 | High-end workstations | \$580-650 | Highest consumer performance |
AMD Ryzen 5 8600 | 6/12 | Budget builds | \$210-240 | Excellent price-to-performance |
Real-World Performance Context: The Ryzen 7 8700X can handle simultaneous 4K video encoding while gaming at 1440p with minimal impact on frame rates, perfect for streamers and content creators who multitask heavily.
Motherboard
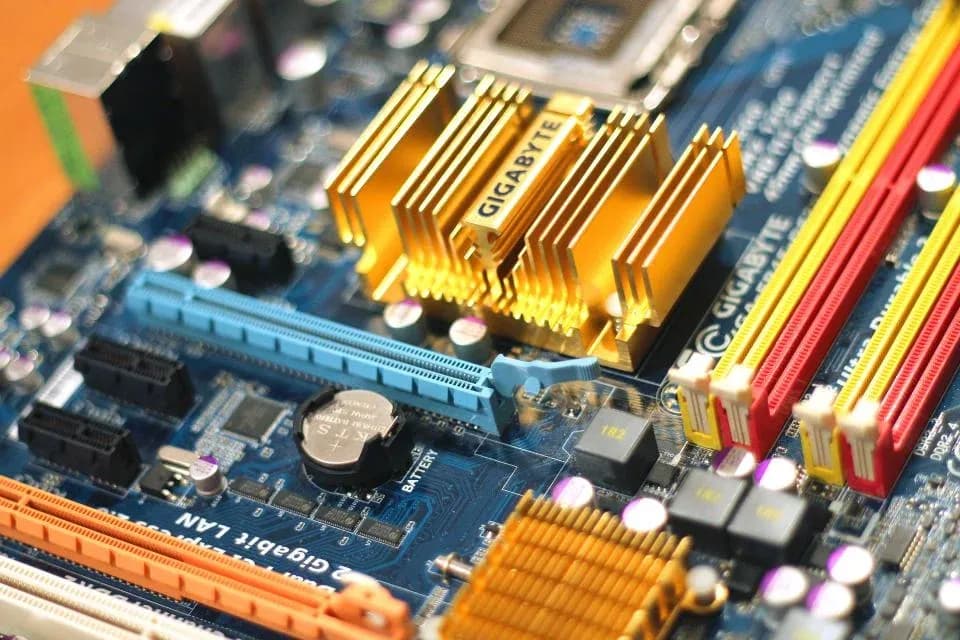
Your motherboard is the central hub that connects all components. While not directly affecting performance like a CPU or GPU, a quality motherboard provides stability, adequate connectivity, and future expansion options.
Key Specifications to Consider:
- Socket Type: Must match your CPU (AM5 for new AMD, LGA1700 for current Intel)
- Chipset: Determines features and overclocking support
- Form Factor: ATX (standard), Micro-ATX (smaller), Mini-ITX (smallest common size)
- Memory Support: Max RAM capacity, speeds, and number of slots
- Expansion Slots: Number of PCIe slots for GPUs, capture cards, etc.
- Storage Options: Number of M.2 slots and SATA ports
- Connectivity: USB ports (number and types), WiFi, Bluetooth, etc.
- VRM Quality: Better VRMs handle power delivery for high-end CPUs
Chipset Comparison (AMD AM5 Platform):
Feature | X670E | X670 | B650E | B650 | A620 |
|---|---|---|---|---|---|
Price Range | \$330-700 | \$280-400 | \$200-300 | \$160-220 | \$120-180 |
CPU OC Support | Extensive | Extensive | Good | Limited | No |
PCIe 5.0 GPU | Yes | Optional | Yes | No | No |
PCIe 5.0 Storage | Yes | Yes | Yes | Optional | No |
USB 4.0 Ports | More | Some | Some | Few | No |
Typical VRM Quality | Excellent | Very Good | Good | Adequate | Basic |
Pro Tip: Don't cheap out on your motherboard. It's the foundation of your system. A quality board with good power delivery will keep your system stable under load and support future upgrades.
RAM (Memory)
RAM provides temporary storage for data your computer is actively using. More RAM allows for more programs to run simultaneously and handles larger workloads efficiently.
Key Specifications to Consider:
- Capacity: 16GB minimum for gaming, 32GB+ for content creation
- Speed: Measured in MHz (e.g., 5200MHz)
- Timings: Lower CL (CAS Latency) numbers are better
- Modules: Usually sold in pairs for dual-channel performance
- Type: DDR5 is current standard, DDR4 for budget builds
- Height: Tall RAM with large heatsinks can interfere with CPU coolers
Configuration Recommendations:
Use Case | Recommended Capacity | Recommended Speed | Estimated Price |
|---|---|---|---|
Budget Gaming | 16GB (2×8GB) DDR5 | 5200MHz CL36 | \$70-90 |
Mid-range Gaming | 32GB (2×16GB) DDR5 | 6000MHz CL36 | \$130-180 |
High-end Gaming/Streaming | 32GB (2×16GB) DDR5 | 6400MHz CL32 | \$160-220 |
Content Creation | 64GB (2×32GB) DDR5 | 5600MHz CL40 | \$220-300 |
Workstation | 128GB (4×32GB) DDR5 | 5200MHz CL42 | \$400-600 |
Dual-Channel Installation: Always install RAM in matching pairs in the correct slots (usually slots 2 and 4 for a two-module configuration). Check your motherboard manual to be sure.
Storage
Storage devices hold your operating system, applications, games, and files. Modern builds typically use a mix of drive types for optimal performance and capacity.
Storage Types:
- NVMe SSD (M.2): Fastest option, connects directly to motherboard
- PCIe Gen4: ~7000MB/s read speeds
- PCIe Gen5: ~12000MB/s read speeds
- SATA SSD (2.5"): Moderate speed, uses SATA cable
- ~550MB/s read speeds
- HDD (3.5"): Highest capacity for lowest cost, but slow
- ~150MB/s read speeds
Optimal Storage Configuration:
Drive Type | Capacity | Purpose | Estimated Price |
|---|---|---|---|
NVMe SSD PCIe 4.0 | 1-2TB | OS, programs, frequently-played games | \$90-180 |
SATA SSD | 1-2TB | Game library, applications | \$70-150 |
HDD | 2-4TB+ | Media storage, backups, archives | \$50-120 |
The Sweet Spot Setup: A 1TB NVMe SSD for Windows and primary applications, paired with either a 2TB SATA SSD for games or a large HDD for mass storage. This gives you speed where it matters most while maintaining good overall capacity.
GPU (Graphics Card)
Your GPU renders images, video, and handles specialized computing tasks. For gaming or content creation, this will likely be your most expensive component.
Key Specifications to Consider:
- VRAM: 8GB minimum for modern gaming, 12GB+ for 4K or content creation
- Core Count: More is generally better for parallel processing
- Clock Speed: Higher speeds mean better performance
- Power Requirements: Higher-end cards need robust PSUs
- Size: Length, width, and height (check case compatibility)
- Cooling Solution: Better coolers mean lower temps and noise
Current Performance Tiers (May 2025):
Performance Tier | NVIDIA Options | AMD Options | Best For | Price Range |
|---|---|---|---|---|
Entry-level | RTX 4050, 4060 | RX 7600, 7600 XT | 1080p Gaming | \$250-350 |
Mid-range | RTX 4070, 4070 Super | RX 7700 XT, 7800 XT | 1440p Gaming | \$450-650 |
High-end | RTX 4080, 4080 Super | RX 7900 XT | 4K Gaming | \$700-950 |
Enthusiast | RTX 4090, 5080 | RX 7900 XTX | 4K+ Gaming, Professional Work | \$1000-1600 |
Real-World Performance Example: An RTX 4070 Super can handle Cyberpunk 2077 at 1440p with ray tracing enabled at 60+ FPS when paired with DLSS 3.5. The comparable AMD RX 7800 XT performs similarly in traditional rendering but lags in ray tracing performance.
Power Supply Unit (PSU)
Your PSU converts AC power from the wall into DC power your components can use. Never compromise on PSU quality. A failure here can damage all other components.
Key Specifications to Consider:
- Wattage: Capacity to deliver power (allow 100-150W overhead)
- Efficiency Rating: 80+ Bronze, Gold, Platinum, or Titanium
- Modularity: Fully modular allows for cleaner cable management
- Protection Features: OVP, UVP, OCP, OTP, SCP
- Fan Quality: Better fans mean quieter operation
- Warranty: Longer warranties indicate manufacturer confidence
Wattage Recommendations:
Build Type | GPU | CPU | Recommended PSU |
|---|---|---|---|
Budget Gaming | RTX 4060 | Ryzen 5 8600 | 650W Gold |
Mid-range Gaming | RTX 4070 | Ryzen 7 8700X | 750W Gold |
High-end Gaming | RTX 4080 Super | Ryzen 9 8950X | 850W Gold/Platinum |
Enthusiast | RTX 4090 | Core i9-14900K | 1000W Platinum |
Reputable PSU Brands: Seasonic, Corsair, EVGA, be quiet!, Super Flower
Pro Tip: Use the Wattage Calculator for precise estimates based on your specific components.
Case (Chassis)
Your case houses and protects all components while facilitating airflow, cable management, and showcasing your build's aesthetic.
Key Specifications to Consider:
- Form Factor: ATX, Micro-ATX, Mini-ITX
- GPU Clearance: Maximum graphics card length
- CPU Cooler Clearance: Maximum cooler height for air coolers
- Radiator Support: Mounting locations and sizes for liquid cooling
- Drive Bays: Number of 2.5" and 3.5" mounts
- Cable Management: Space behind motherboard tray, routing options
- Airflow Design: Mesh fronts provide better cooling than solid panels
- Included Fans: Quality and quantity of stock fans
- Front I/O: USB ports, audio jacks, buttons
Case Recommendations by Build Type:
Build Type | Recommended Cases | Price Range | Features |
|---|---|---|---|
Airflow-Focused | Fractal Design Meshify 2, Phanteks P500A | \$90-150 | Mesh panels, multiple fan mounts |
Quiet Operation | be quiet! Pure Base 500DX, Fractal Define 7 | \$110-180 | Sound dampening, solid panels |
Compact ATX | Corsair 4000D, NZXT H510 Flow | \$80-120 | Smaller footprint, good cable management |
Showcase | Lian Li O11 Dynamic, Corsair 5000X | \$150-200 | Tempered glass, RGB integration |
Budget-Friendly | NZXT H510, Corsair 275R | \$60-90 | Good quality, fewer features |
Airflow Configuration Guide:
- Positive Pressure: More intake than exhaust fans (reduces dust)
- Negative Pressure: More exhaust than intake fans (potentially better cooling)
- Balanced: Equal intake and exhaust (best of both worlds)
Cooling Solutions
Keeping your components cool ensures stability, longevity, and optimal performance. Cooling solutions range from stock CPU coolers to elaborate custom liquid cooling loops.
Air Cooling
- Pros: Affordable, reliable, zero maintenance
- Cons: Larger footprint, potentially louder, limited cooling capacity
Recommended Air Coolers:
Performance Level | Cooler Options | Price Range | TDP Support |
|---|---|---|---|
Budget | ID-Cooling SE-224-XT, Arctic Freezer 34 | \$30-45 | ~150W |
Mid-range | Noctua NH-U12S, be quiet! Dark Rock 4 | \$60-80 | ~180W |
High-end | Noctua NH-D15, be quiet! Dark Rock Pro 4 | \$90-110 | ~220W |
AIO (All-In-One) Liquid Cooling
- Pros: Better cooling performance, cleaner aesthetic, smaller footprint around CPU
- Cons: Higher cost, potential pump failure, radiator space required
Recommended AIO Coolers:
Radiator Size | Cooler Options | Price Range | Best For |
|---|---|---|---|
240mm | Arctic Liquid Freezer II 240, Corsair H100i | \$90-130 | Mid-range CPUs |
280mm | NZXT Kraken X63, Arctic Liquid Freezer II 280 | \$110-150 | High-end CPUs |
360mm | Corsair H150i, Lian Li Galahad 360 | \$140-180 | Enthusiast CPUs/Overclocking |
Cooling Installation Tips:
- Thermal Paste Application: Pea-sized dot in center for most CPUs
- AIO Radiator Position: Tubes down when front-mounted
- Fan Direction: Check airflow arrows on fan frame
- Push vs. Pull: Push configuration generally works better
Step 3: Assemble Your Build
Preparation Checklist
Before starting assembly, gather these items:
- Phillips screwdriver (preferably magnetic)
- Anti-static wrist strap (optional but recommended)
- Good lighting
- Small container for screws
- Zip ties for cable management
- Isopropyl alcohol and microfiber cloth (for thermal paste cleanup if needed)
- Thermal paste (if not pre-applied to cooler)
Workspace Setup
- Clean, hard surface (avoid carpet)
- Plenty of space to lay out components
- Keep drinks away from the workspace
- Ground yourself by touching a metal object before handling components
Assembly Sequence
Follow this order for the smoothest build experience:
1. CPU Installation
CPU installation is one of the most delicate parts of the build. Take your time here.
For AMD AM5:
- Lift the retention arm on the motherboard socket
- Match the triangle on the CPU corner with the socket triangle
- Gently lower the CPU into place (it should sit flat)
- Lower the retention arm and lock it in place
For Intel LGA1700:
- Open the loading mechanism by pushing down and out on the lever
- Open the retention plate
- Match the notches on the CPU with the socket
- Gently place the CPU into the socket
- Close the retention plate
- Secure the loading mechanism
Common Mistakes to Avoid:
- Never force the CPU into place
- Don't touch the bottom of the CPU (gold contacts)
- Ensure proper alignment before applying any pressure
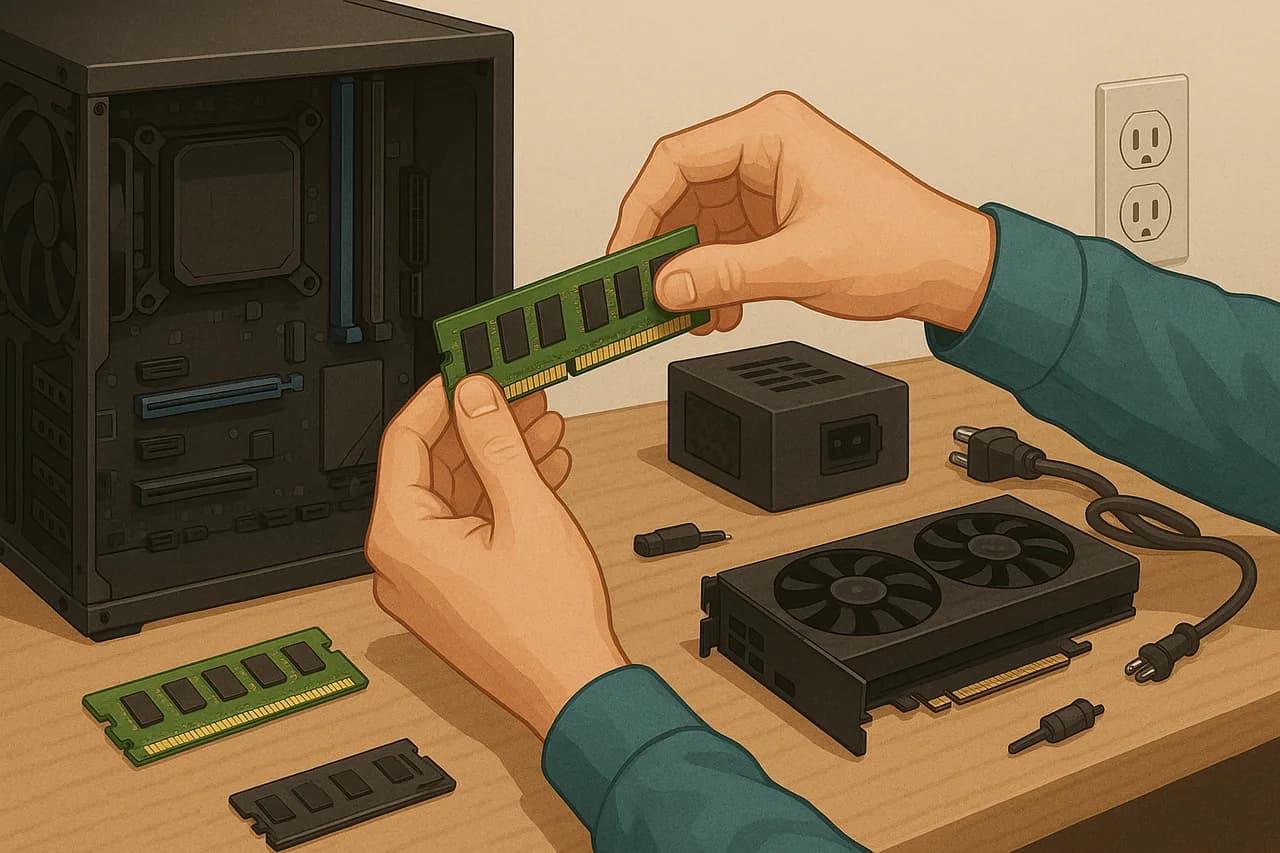
2. RAM Installation
- Open the retention clips on the motherboard's DIMM slots
- Align the RAM notch with the slot's key
- Apply even pressure until the module clicks into place
- Verify the retention clips close automatically
For dual-channel operation:
- With 2 sticks: Use slots A2 and B2 (typically the 2nd and 4th slots)
- With 4 sticks: Fill all slots
3. M.2 SSD Installation
- Locate the M.2 slot on your motherboard
- Remove the mounting screw and standoff if necessary
- Insert the M.2 SSD at a 30-degree angle
- Press down gently and secure with the mounting screw
Note: Some M.2 slots share bandwidth with SATA ports. Check your motherboard manual to see if certain SATA ports will be disabled when using specific M.2 slots.
4. CPU Cooler Installation
For Air Coolers:
- Apply thermal paste if not pre-applied (pea-sized dot in center)
- Align the cooler with the mounting mechanism
- Tighten screws in a cross pattern, making partial turns on each
- Connect the fan to the CPU_FAN header on the motherboard
For AIO Liquid Coolers:
- Attach the mounting bracket to the motherboard
- Apply thermal paste if not pre-applied
- Secure the pump block to the CPU
- Mount the radiator to the case (tubes down if front-mounted)
- Install fans in the correct direction
- Connect the pump to the AIO_PUMP or CPU_FAN header
- Connect fans to the included controller or appropriate headers
5. Motherboard Installation
- Install I/O shield into the case (if not pre-installed on motherboard)
- Verify standoffs are installed in the correct positions
- Lower motherboard into case, aligning rear I/O with the shield
- Secure with screws, starting from the center and working outward
Pro Tip: Connect some cables like CPU power before installing the motherboard if your case has limited space.
6. Connect Front Panel Headers
These small cables connect your case's buttons and lights to the motherboard:
- Power button
- Reset button
- Power LED
- HDD activity LED
- USB headers
- Audio headers
Troubleshooting Tip: If your PC doesn't power on later, double-check these connections first. The tiny power switch connector is often misplaced.
7. Storage Installation
For 2.5" SSDs:
- Locate SSD mounting locations in your case
- Secure SSD with screws
- Connect SATA data cable to motherboard
- Connect SATA power from PSU
For 3.5" HDDs:
- Insert drive into drive bay
- Secure with screws or tool-less mechanism
- Connect SATA data cable to motherboard
- Connect SATA power from PSU
8. PSU Installation
- Position PSU in the case (fan facing down if there's bottom ventilation)
- Secure with screws
- Connect cables in this order:
- 24-pin motherboard power
- 8-pin CPU power (and 4-pin additional if needed)
- PCIe power cables (for GPU)
- SATA power cables
- Peripheral power as needed
Modular PSU Tip: Connect cables to the PSU before installation if space is tight.
9. GPU Installation
- Remove appropriate PCIe slot covers from the case
- Align GPU with the top PCIe x16 slot
- Insert with even pressure until it clicks
- Secure the bracket to the case
- Connect PCIe power cables from the PSU
Anti-Sag Tip: For heavy GPUs, consider a support bracket to prevent long-term PCIe slot damage.
10. Cable Management
Good cable management improves airflow, appearance, and ease of future upgrades:
- Route cables behind the motherboard tray
- Group cables with zip ties or velcro straps
- Keep cables away from fans
- Use combs for visible cables (like 24-pin and GPU power)
Before/After Cable Management:
11. Final Check
Before closing the case, verify:
- All components are securely mounted
- All power cables are connected
- RAM is fully seated
- CPU cooler is properly mounted
- Storage devices are connected (data and power)
Step 4: First Boot and Setup
Pre-Power Checklist
Before pressing the power button, check:
- Monitor is connected to GPU (not motherboard)
- Keyboard and mouse are connected
- PSU power switch is in the ON position
- All cables are properly connected
The Moment of Truth
- Press the power button
- Watch for:
- Fans spinning
- BIOS/POST screen
- Error codes or beeps
If Nothing Happens:
- Check power connections
- Verify front panel connectors
- Ensure PSU switch is on
- Try jumping the power switch pins with a screwdriver
BIOS Setup
Enter BIOS by pressing the appropriate key during startup (usually Delete, F2, or F12):
- Enable XMP/DOCP to get full RAM speed
- Check CPU and system temperatures
- Verify all components are detected
- Set boot order with your installation media first
- Save settings and exit
Windows/OS Installation
- Insert USB installation media
- Follow on-screen prompts to install your OS
- During installation, create partitions if needed
- Complete the installation process
Essential First Tasks
After OS installation:
- Install chipset drivers from your motherboard manufacturer
- Update Windows to get latest security patches
- Install GPU drivers from NVIDIA or AMD
- Check Device Manager for any unknown devices
- Run benchmarks to verify system performance
Recommended Software:
- CPU-Z and GPU-Z for system information
- Speccy for system information
- HWiNFO for temperature monitoring
- Cinebench for CPU benchmarking
- 3DMark for GPU benchmarking
Step 5: Optimization and Troubleshooting
Performance Optimization
BIOS Tweaks:
- Enable Resizable BAR/Smart Access Memory
- Set appropriate fan curves
- Verify RAM is running at rated speeds
- Enable CPU virtualization if needed
Windows Optimizations:
- Set Power Plan to Balanced or High Performance
- Disable unnecessary startup programs
- Enable Game Mode for gaming
- Update drivers regularly
Common Issues and Solutions
Problem | Possible Causes | Solutions |
|---|---|---|
No Power | PSU switch off, loose connections | Check PSU, reseat cables, verify power button connection |
No Display | GPU not seated, monitor on wrong input | Reseat GPU, check display cable, try onboard graphics |
Boot Loop | RAM issues, CPU overheating | Try one RAM stick, check cooler mounting |
BIOS Not Detecting Drive | Loose connections, BIOS settings | Check SATA/power cables, enable correct SATA mode |
System Crashes | Overheating, unstable RAM | Check temperatures, run memory test, verify PSU adequacy |
Blue Screen | Driver issues, hardware failures | Note error code, update drivers, check Event Viewer |
Temperature Expectations
Component | Idle Temperature | Load Temperature | Concerning Above |
|---|---|---|---|
CPU | 30-40°C | 60-80°C | 90°C |
GPU | 30-45°C | 65-85°C | 95°C |
M.2 SSD | 30-40°C | 50-70°C | 80°C |
Motherboard | 30-40°C | 40-60°C | 75°C |
Cooling Tip: If temperatures are too high, verify case airflow, consider reapplying thermal paste, or upgrade cooling solutions.
Step 6: Maintenance Guide
Regular Maintenance Schedule
Task | Frequency | Details |
|---|---|---|
Dust Cleaning | 3-6 months | Use compressed air, focus on fans and heatsinks |
Driver Updates | Monthly | Check GPU, chipset, and peripheral drivers |
Windows Updates | Monthly | Security and performance patches |
Disk Cleanup | Monthly | Remove temporary files and unused programs |
SSD Optimization | 6 months | Check health, ensure TRIM is enabled |
Cable Management | Yearly | Reorganize cables, check for wear |
Thermal Paste | 2-3 years | Replace paste if temperatures increase |
Monitoring Your System
Keep an eye on these metrics:
- Temperatures: Use HWiNFO or similar software
- Storage Health: Check S.M.A.R.T. data with CrystalDiskInfo
- Performance: Run periodic benchmarks to detect degradation
- Noise Levels: Unusual sounds can indicate failing components
Conclusion: Beyond the Build
Congratulations! You've successfully built your own PC. But this is just the beginning of your journey. Now you can:
Next Steps to Consider:
- Fine-tune your system with custom fan curves and power plans
- Learn about overclocking for extra performance
- Experiment with RGB lighting if your components support it
- Plan upgrade paths for future improvements
- Join PC building communities to share your build and learn more
Community Resources:
- PC Building Communities:
- r/buildapc
- r/battlestations
- PCPartPicker Build Guides
- Learning Resources:
- Linus Tech Tips
- Gamers Nexus
- PC Building Simulator
My Personal Takeaway
Building your first PC is about more than just assembling parts. It's about joining a community, developing technical skills, and gaining confidence in your abilities. Each build gets easier, and the satisfaction of pressing that power button never gets old.
Whether your new PC is for gaming, work, or creative pursuits, you now have a machine that's truly yours—built with your own two hands and perfectly suited to your needs.
FAQ: Common Questions
Q: How much money can I save by building my own PC?
A: Typically 15-30% compared to pre-built systems with equivalent specs, plus you get higher quality components.
Q: Is it safe to build a PC myself? Can I damage components?
A: With basic precautions like grounding yourself, the risk is minimal. Modern components are quite robust.
Q: Do I need special tools to build a PC?
A: Just a Phillips screwdriver and maybe zip ties for cable management. Anti-static wrist straps are optional but recommended.
Q: How long does it take to build a PC for the first time?
A: Expect 3-5 hours for your first build, including reading manuals and taking your time.
Q: What's the minimum budget for a decent gaming PC?
A: Around \$800-900 for a 1080p gaming PC that can handle most modern games at medium to high settings.
Q: Do I need to buy Windows, or can I use it for free?
A: You can install Windows without activation with a few limitations (personalization options, watermark), or purchase a license.
Q: How often should I upgrade my PC?
A: For most users, a GPU upgrade every 3-4 years and a full platform upgrade (CPU, motherboard, RAM) every 5-6 years is reasonable.
Last updated: May 2025